Design of efficient miRNA
On this page, you will find all the details for the design and cloning of an efficient microRNA (that we call mirGE) based on our published article.
Background:
Until now, it seems that nobody really tried to optimize the design of miRNAs to achieve maximum efficiency. There was 2 main reasons for this. First, laziness. Why try to understand what really matters in miRNA processing and efficiency if you do not need it because your experimental settings are not concerned by efficiency. Second, no need for it. If you are not working on clinically-relevant projects, i.e. trying to combine efficacy and safety to reach a compromise that can be translated into a cure, you do not need to optimize your molecular tools. You just add more vectors to your cell lines and you can publish. However, if you need to downregulate a gene to less than 10% of its expression to achieve a phenotype, but with only one or two copies of a viral vector, because you do not want to pile up copies of foreign DNA in the genome of the patient's cells, then you need to go back to the drawing board. That is what we have done when trying to render human cells resistant to HIV by suppressing expression of its co-receptor, CCR5. Since no currently available design was efficient enough for our purpose, we had to go back to the basics, and develop a new miRNA design (mirGE) from what we understood of the mechanistics of miRNA-based silencing.
Design of the mirGE sequence
The mirGE sequence is composed of lower legs, upper legs, and the specific shRNA comprising the hairpin with the loop. You can find all the details in our article.
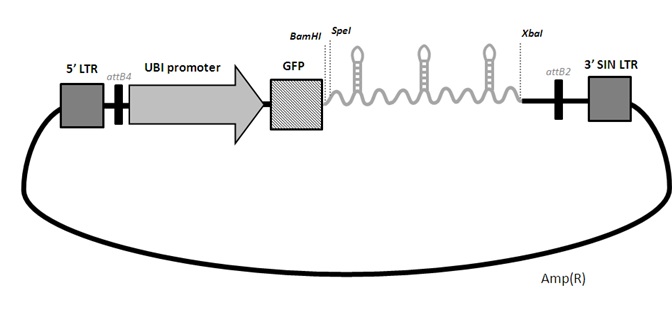
We now order directly from gene synthesis companies (such as GenArt from Thermo) the full insert containing the mirGE loops and a spacer. We have observed that a spacer must be present, either in 5' or in 3' for proper processing. This spacer is either a part of GFP, non coding, with 3 stop codons, in 5', or the human Histone 2B in 3', also with 3 stop codons. The 2 spacers work equally well. You may choose the H2b in case you already have GFP in your final lenti backbone, to avoid unwanted recombinations between two long stretches of identical GFP sequences during reverse transcription. The RT is known to be quite jocular.
Also, we always put 3 mirGE hairpins in tandem, mimimum, and up to 6 maximum. We found that a minimum of 3 hairpin ensures optimal processing, hence efficiency. The 3 hairpins can identical of 3 different hairpins.
The standard motif is as below:
5’-GGTGATAGCAATGTCAGCAGTGCCTNNNNNNNNNNNNNNNNNNNNNNGTGAAGCCACAGATGNNNNNNNNNNNNNNNNNNNNNNAAGTAAGGTTGACCATACTCTAC
Targeting strand is in BLUE, passenger strand is in RED.
Algorithm
- Copy your target sequence (ORF, 3'UTR, etc).
- Use the three following web tools to select ten target sequences or more. If one site gives you only 2 or that is fine also.
- link 1 >> Horizon Dharmacon siDESIGN Center
- link 2 >> GenScript siRNA Target Finder
- link 3 >> RNA XS (Vienna, Austria)
- link 4 >> i-Score Designer (Japan)
- link 5 >> ThermoFischer BLOCK-iT RNAi Designer
- Select candidates. Do not favor the ranking but favor candidates that are present in most servers.
- Blast each 19mer to check that they are targeting no other gene other than your target gene.
- Exclude “bad” candidates by following instructions of this review of reference (See PDF).
- Extend 19mer to 22mer by adding nucleotides from the original target sequence, either upstream or downstream, favoring a resulting complementary sequence that will have a T on the 5’ end (reference). This can done also by merging targets that are overlapping between servers by 1 to 3 nucleotides.
- This 22mer is the basis for the following shRNA design. For human CCR5 mRNA (GenBank: NM_000579.3), the result is TTTCCATACAGTCAGTATCAAT (22mer).
- Make a complementary strand to this 22mer, which will be the top strand of mirGE context, i.e the targeting strand. To be efficiently incorporated into RISC, the 5’ terminus A needs to flap, thus make a wobble on the complementary strand (Z)
5’-ATTGATACTGACTGTATGGAAA
3’-ZAACTATGACTGACATACCTTT
- Make another wobble on the complementary strand corresponding to position +12 of the targeting strand, to suppress abortive processing (reference). As a general rule: Antiparallel (targeting) sequence being in blue, 100% complementary to target mRNA (in red)
5’- NNNNNNNNNNNNNNNNNNNNNN
3’- ZNNNNNNNNNNZNNNNNNNNNN
- Then choose Z to add to bottom oligo according to the N in top oligo facing Z. If N is T, make Z a C. If N is C, make Z an A. If N is A, make Z a C. If N is G, make Z an A.
- Replace NNN stretches by sense and antisense oligos to make the final mirGE.
Ordering the final pENTR construct
We now order directly from GenArt, the full insert with the hairpins and the spacer, the whole insert being ordered in a pENTR plasmid. The pENTR-mirGE clones can then be used directly for LR Gateway recombination in any DEST system.
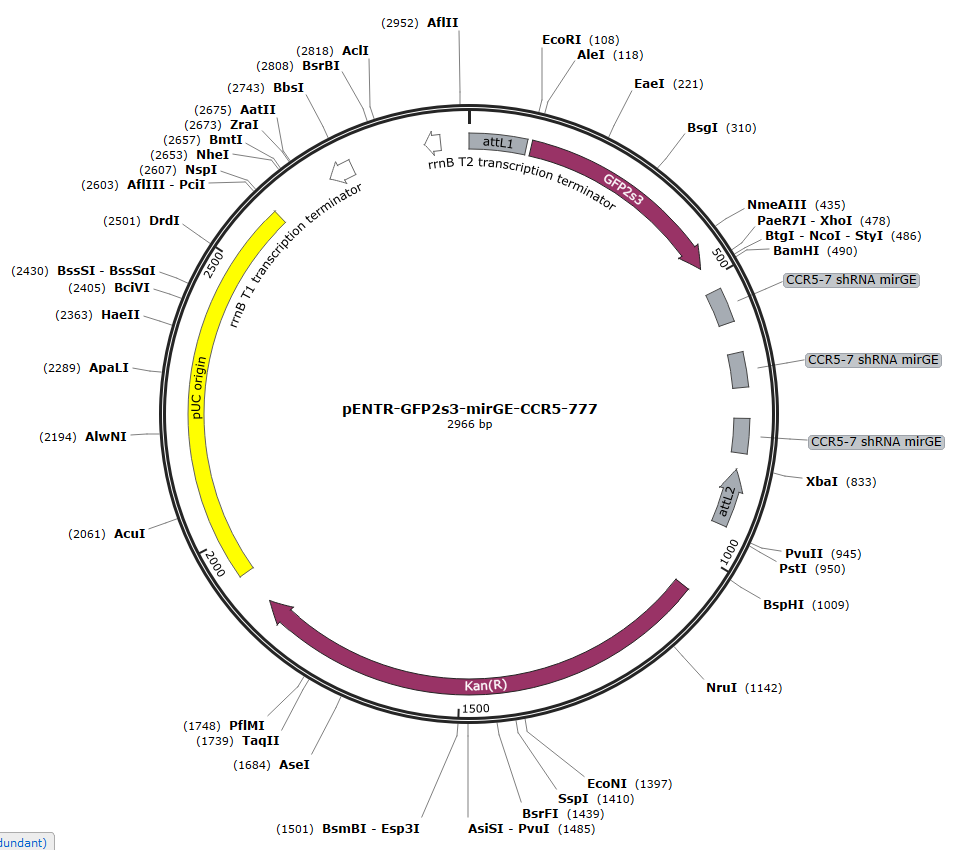
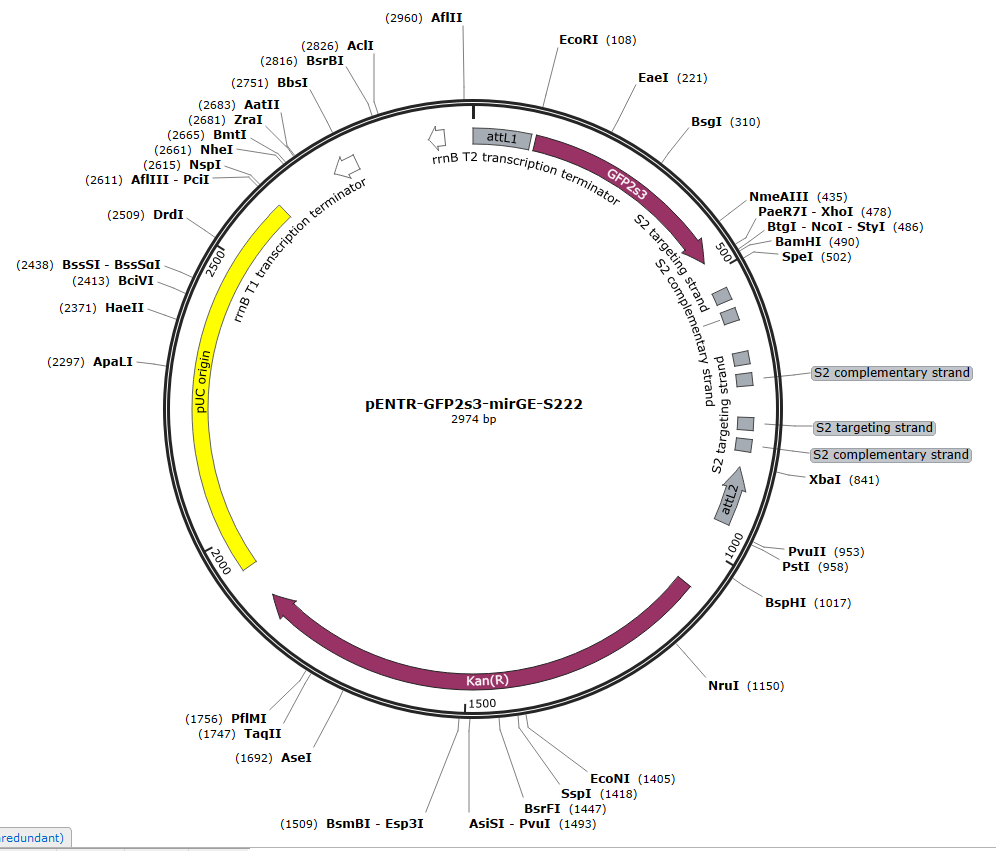
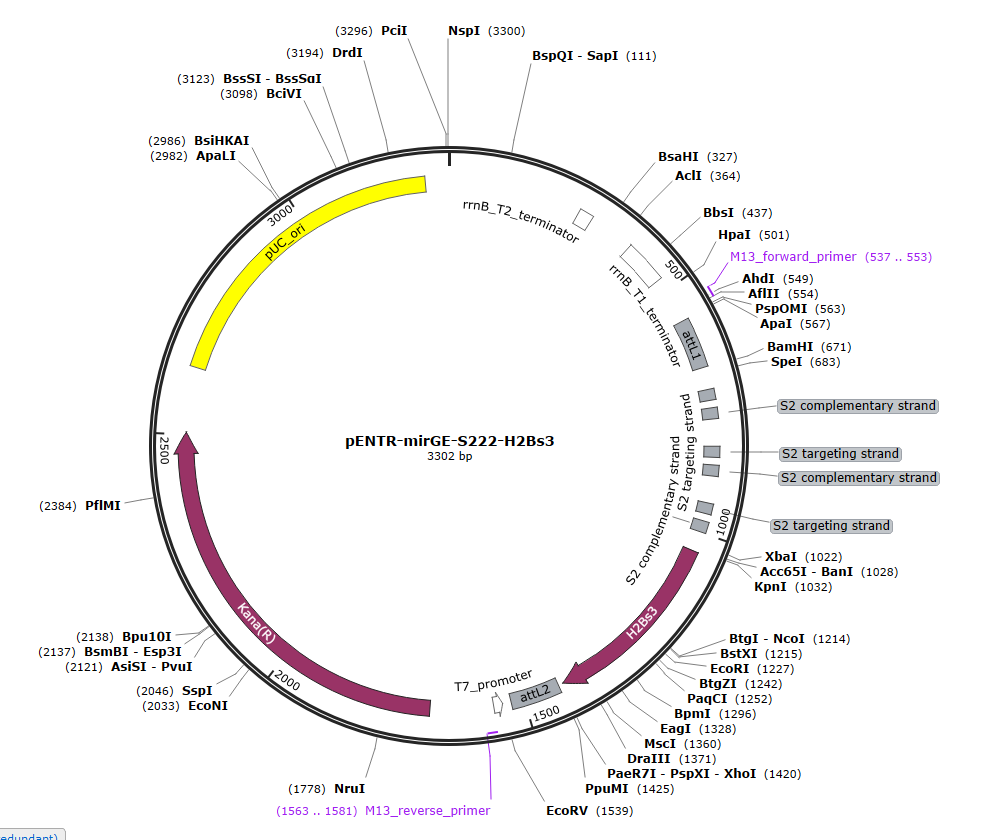
You can download the .gb files of the 3 following pENTR plasmids for inspiration. Just click on the picture to download the .gb file. One is for KD of CCR5, the two others are for control purposes, with a targeting sequence that has no match in mammalian DNA (S222).
The old recipe with PCR cloning. Not much cheaper but much more time consuming.
Sequences are shown as you must order them, ready to serve as template and primers to PCR amplify. Targeting strand is in BLUE, passenger strand is in RED.
Replace NNN stretches by sense and antisense oligos to make the PCR template oligo.
- 5' oligo for PCR amplication of the mirGE hairpin
5’-cagaaggggatccATCGATactagtGGTGATAGCAATGTCAGCAGT
The sequence annealing to mirGE template is underlined. The sequences for restriction sites BamHI and SpeI are in bold lower case.
- 3' oligo for PCR amplication of the mirGE hairpin
5’-AGTAGCTtctagaGTAGAGTATGGTCAACCTT
The sequences annealing to mirGE templates are underlined. The sequence for restriction site XbaI is in bold lower case.
- template oligo containing the hairpin
5’-GGTGATAGCAATGTCAGCAGTGCCTNNNNNNNNNNNNNNNNNNNNNNGTGAAGCCACAGATGNNNNNNNNNNNNNNNNNNNNNNAAGTAAGGTTGACCATACTCTAC
- Amplify this template with the 5' and 3' PCR oligos described above, using Herculase 2.
Final cloning steps
Once you have your mirGE PCR band (amplicon), purify it and cut it with BamHI and XbaI and ligate into a pENTR-deltaGFP-mirGE plasmid as described below (pENTRdeltaGFP-mirGE-DroshaT115).
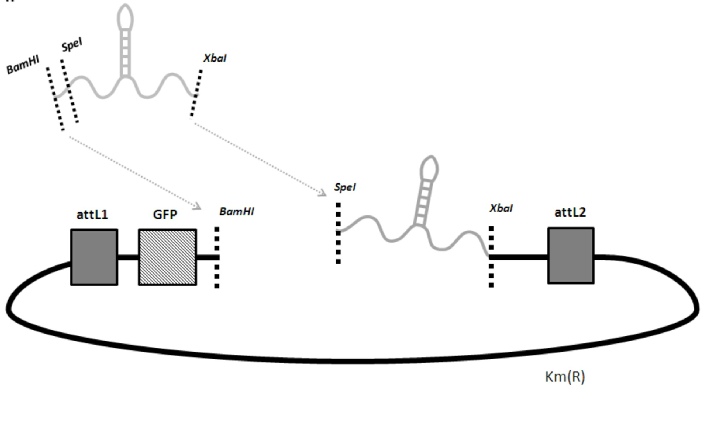
If you want to add more hairpins, just cut the pENTR plasmid already having hairpin (s) with BamHI and SpeI and ligate your new hairpin inside. For example, you can open the pENTRdeltaGFP-mirGE-DroshaT115 (deposited at Addgene) with BamHI and XbaI. Purify and keep the plasmid band (3000 bp) from the insert band (approx 360 bp, i.e. 3 loops), and use it to ligate your own mirGE amplicon into it. pENTRdeltaGFP has 3 stop codons in the GFP ORF to kill GFP translation. So GFP ORF is used as a spacer between the 5' cap and the mirGE stems. Sequence the insert after each insertion step. Once you have your final pENTR-deltaGFP-mirGExxx plasmid, you can do a LR reaction with any of the LentiDEST plasmids we have deposited at Addgene. For example, once you have your pENTR-mirGE with the desired number of correct hairpins, you can do a LR reaction with pCLX-R4-DEST-R2 and pENTR-UBI, to have a final lenti plasmid expressing your mirGE from the UBI promoter.